
Email setup guide
Set up email in Apple Mail (Mac)
Follow these steps to add your iHwy-hosted email account to the Mail app on your Mac.
Your domain
Wherever this guide says yourdomain.com, use the part of your email address after the @ sign. For example, if your address is jane@example.org, your server is mail.example.org and your username is jane@example.org.
Steps
- Open Mail and choose Mail, then Add Account. Select Other Mail Account and click Continue.
- Enter your name, email address, and password, then click Sign In.
- If Mail can’t find the settings on its own, choose IMAP and enter mail.yourdomain.com as both the incoming and outgoing server.
- Go to Mail, then Settings, then Accounts. Select your account and open the Server Settings tab.
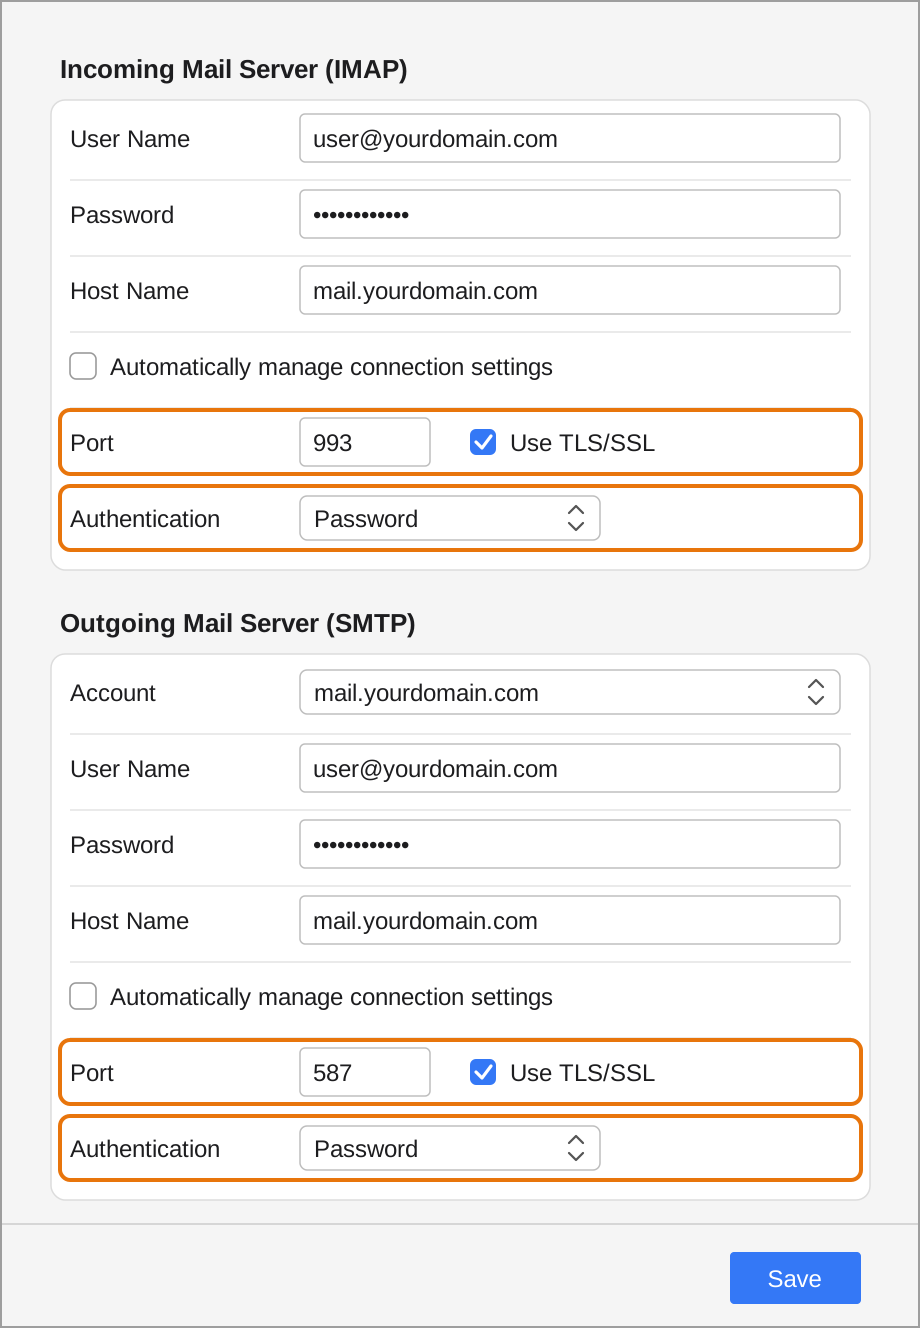
- In both the Incoming and Outgoing sections, uncheck Automatically manage connection settings, enter the settings shown below, then click Save.
Settings to check
- Incoming: port 993, Use TLS/SSL on, Authentication Password.
- Outgoing: port 587, Use TLS/SSL on, Authentication Password. If outgoing Authentication is set to None, Mail connects but every message fails to send.
- User name: your full email address in both sections.
For the full list of server settings, see the Email Setup Guide.
Still not working?
See the troubleshooting tips at the end of the Email Setup Guide, or open a support ticket and send us a screenshot of your settings.